How To Use Meta (Facebook) Business Manager
Think of Meta Business Manager as your central control hub, where you can seamlessly handle all your Facebook marketing and advertising tasks.
If your brand or business is active on Facebook, it’s essential to make use of Facebook Business Manager. As part of the Meta Business Suite, this tool ensures the safety, centralization, and organization of your Facebook business assets, whether you’re a solo operator or part of a team.
If you’ve been delaying the setup of Business Manager due to uncertainties about how it functions, here’s some good news. In just 10 straightforward steps, this tutorial will guide you through everything—from creating your account to launching your inaugural ad campaign.
Let’s explore what Facebook Business Manager entails, who can benefit from creating an account, and how to set up an account tailored to your brand.
What Does Facebook Business Manager (or Meta Business Manager) Do?
Facebook Business Manager, now known as Meta Business Manager, is a free platform designed to assist you in efficiently managing and organizing your business activities on Facebook. According to Meta, Business Manager is a tool that “helps advertisers integrate Facebook marketing efforts across their business and with external partners.”
In essence, it serves as a centralized dashboard for overseeing all your Facebook marketing and advertising endeavors. This includes the ability to manage access for multiple users to your Facebook page and other assets, such as your Instagram account and product catalogs.
Key Functions of Business Manager include:
- Centralized Tracking: Monitor the performance of your Facebook and Instagram ads through detailed reports.
- Controlled Access: Grant access to vendors, partners, and agencies for your pages and ads without relinquishing ownership of the assets.
- Separation of Business and Personal Activities: Keep your business activities distinct from your profile, avoiding the risk of posting in the wrong place or getting sidetracked by unrelated content.
If you’re still uncertain about whether setting up a Meta Business Manager account is right for you, let’s delve into who should use it and the reasons behind it.
Why should you create a FaceBook Business Manager account?
There are various situations where having a Meta Business Manager account can be beneficial. Here are a few reasons why you might want to create an account:
- Brand Social Media Manager: If you’re a social media manager or part of a marketing team for a business, Meta Business Manager is the essential tool. It streamlines access and management of your Facebook or Instagram business pages for multiple team members.
- Creator or Business Owner: For creators or business owners, a Business Manager not only helps organize and manage your business but also ensures a clear separation from your account. Your audience sees only your brand-related information, like your name, work email, and Pages and ad accounts.
- Managing Multiple Assets or Accounts: If you handle various Facebook or Instagram assets, such as Pages, ad accounts, or business apps, a central platform like Business Manager keeps everything organized.
- Collaboration with External Vendors: Working with external vendors, like a marketing agency for creating, running, or managing your Facebook Pages or ads? Meta Business Manager simplifies granting access to external team members while maintaining ownership of all your assets.
If you find yourself in any of these scenarios, let’s walk through the steps to set up your Meta Business Manager account.
How to set up a Facebook Business Manager
Before you dive into creating your Meta Business Manager account, there are a couple of key things to keep in mind:
- Personal Facebook Account Required: To create a Facebook Business Manager account, you need to have a personal Facebook account. This personal account is what you’ll use to log in and verify your identity.
- Limit of Two Business Manager Accounts: You can only create a maximum of two Business Manager accounts.
Now that we’ve covered these prerequisites, let’s move on to the steps for setting up your Meta Business Manager account.
Step 1. Create your Business Manager account
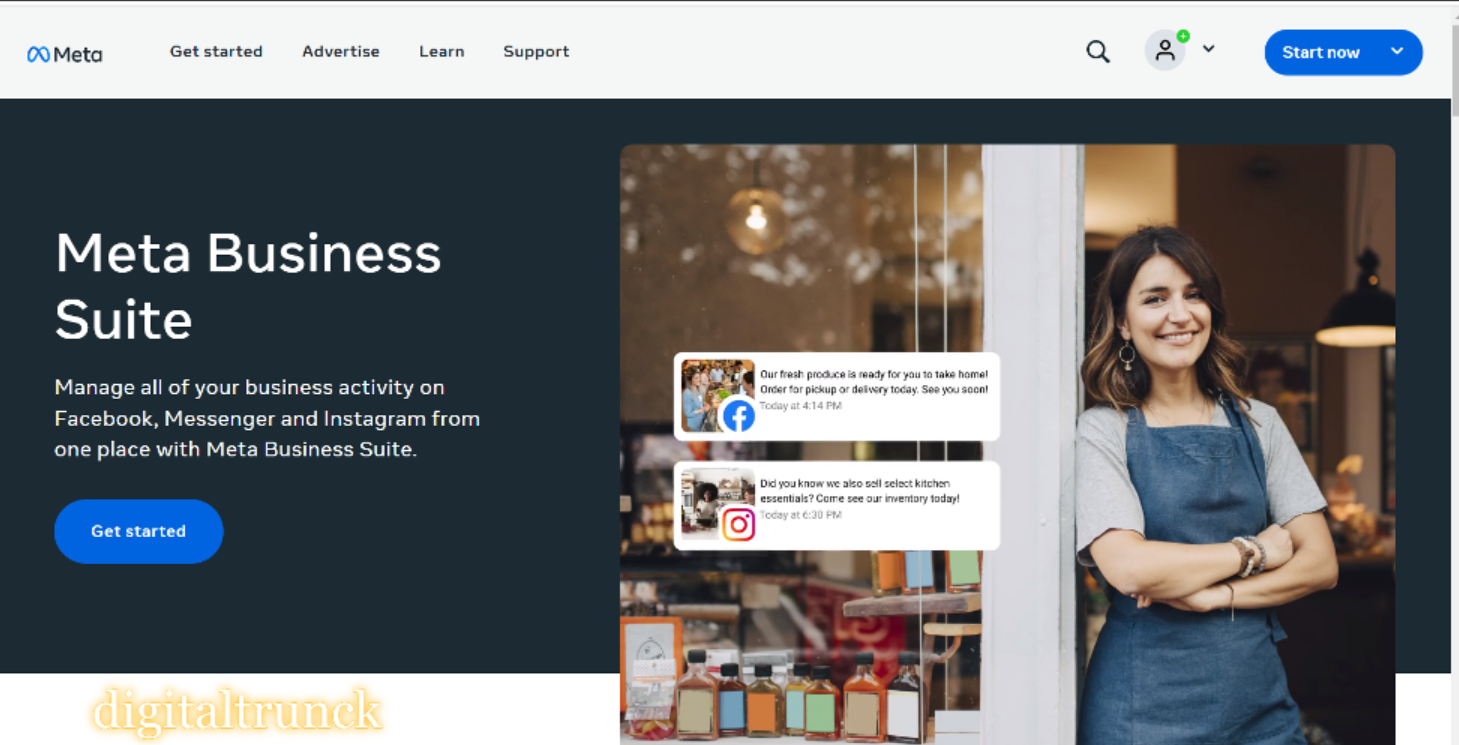
- Head over to business.facebook.com. You can either log in using your existing Facebook or Instagram account or create a new account if you don’t have one yet.

- To set up your business account in Business Manager, simply input your business and account names. Additionally, include your name and business email for account verification. Once done, click Submit to create your account.
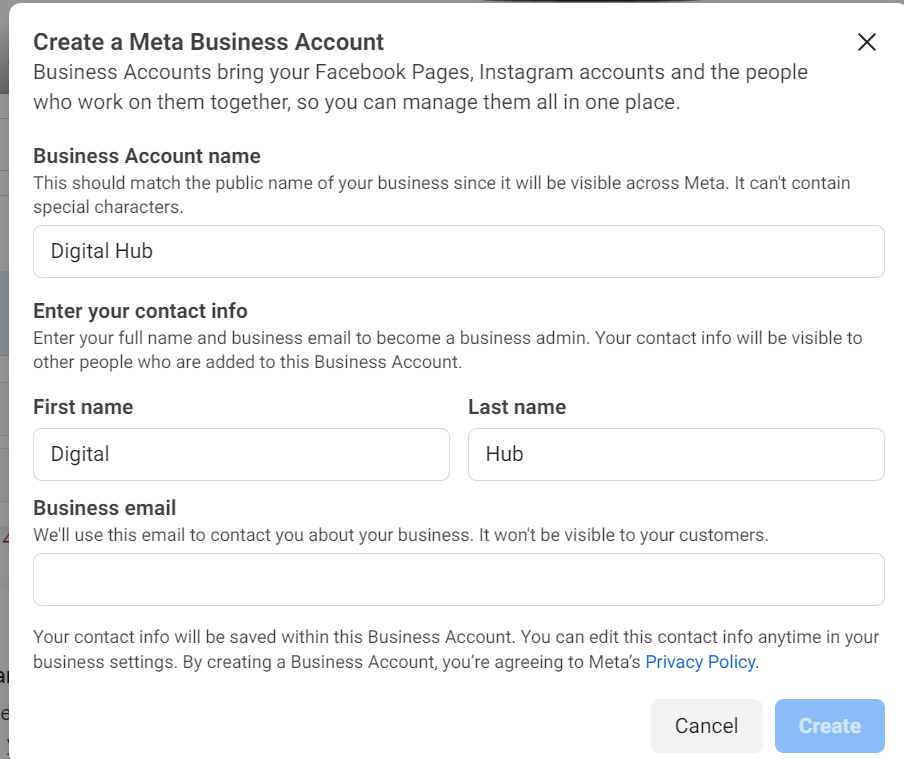
- Keep an eye on your email for a message titled “Confirm your business email.” Once you find it, just click on “Confirm Now” within the message.
- After confirming your account, the next step is to provide your business details. This includes your business’s legal name, address, phone number, and website.

Step 2. Add your Facebook Business Page(s)
Now, at this stage, you’ve got a couple of options to consider. You can either link an existing Facebook business page or create a new one. If you’re managing Facebook pages for clients or other businesses, there’s also the option to request access to someone else’s page.
Here’s a crucial distinction to remember: when managing clients’ Facebook pages and ad accounts, use the Request Access option instead of the Add Page option. Adding your client’s pages and ad accounts directly to your Business Manager may restrict their access to their business assets, creating potential tensions in your business relationship.
For this post, let’s assume you’re handling your assets rather than acting as an agency. We won’t delve into the Request Access process here. However, keep this difference in mind. If you haven’t set up your Facebook Business page yet, we have a video tutorial to guide you through the process. Check out the video above, and once you’re done, return here to seamlessly add your page to Facebook Business Manager.
To add your Facebook page to Facebook Business Manager:
- From the Business Manager menu, click Business Assets. Click Pages, then select the blue button that says Add Pages.

- Moving forward, you’ll be presented with a few choices. You can opt to start a new Facebook Page, take ownership of an existing Facebook Page, or seek permission to collaborate on a Facebook Page.
- Once you’ve chosen “Claim an existing Facebook Page,” begin typing the name of your Facebook business page in the provided text box. The name of your business page should appear automatically below, allowing you to click on it. If you have administrator access to the page you’re adding, your request will be approved automatically.
Step 3. Add your Facebook ad account(s)
Keep in mind that once you include your ad account in Facebook Business Manager, it’s a permanent addition that can’t be undone. Therefore, it’s crucial to add only those accounts that belong to you. If you need access to a client’s account, opt for the Request Access option.
For those already engaged in Facebook ads, linking your existing ad account involves the following steps:
- Navigate to the Business Manager dashboard and click on Add Ad Account.
- Click on Add Ad Account once more.
- Enter the ad account ID, which you can locate in Ads Manager.
If you don’t have a Facebook ads account yet, the process of adding an ad account mirrors that of adding a Page:
- From the Business Manager menu, choose Business Assets.
- Once there, click on the blue button in the right-hand corner labeled Add Assets.
Step 5: Add your Instagram account
Now that you have your Facebook assets in place, you can link your Instagram account to Meta Business Manager.
- Head to your Business Manager dashboard and select Business Settings.
- On the left, choose Instagram accounts, and then click Add. In the pop-up box, input your Instagram login details and click login to establish the connection.

Add Instagram’s account to meta business manager
Step 6: Set up Facebook Pixels
Ever heard of a Facebook Pixel? In simple terms, it’s a small piece of code generated by Facebook. When you embed this code on your website, it opens up a gateway to valuable information. This data allows you to track conversions, optimize your Facebook ads, create precise audiences for your ads, and reconnect with potential customers.
We suggest getting your Facebook pixel in place right away, even if you’re not gearing up for your first ad campaign just yet. The insights it offers now will prove handy when you decide to dive into advertising.
Our comprehensive guide on using Facebook pixels is an excellent reference, covering everything you need to know about maximizing the benefits of this tool. But for now, let’s walk through setting up your pixel within Meta Business Manager.
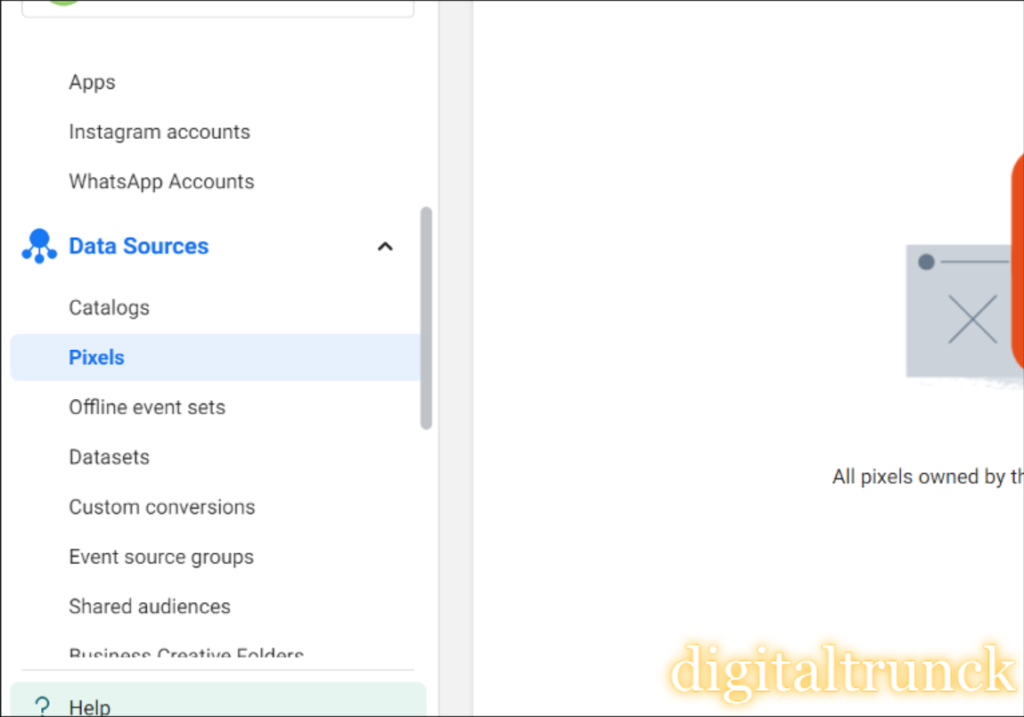
- Navigate to your Business Manager dashboard and select Business Settings.
- In the left column, expand the Data Sources menu, click Pixels, and then hit Add.
3. Provide a name (up to 50 characters) for your pixel. Enter your website URL so Facebook can offer optimal setup recommendations for your pixel. Once done, click Continue. Keep in mind that clicking Continue implies agreement to the Pixel terms and conditions, so it’s advisable to review them before proceeding.
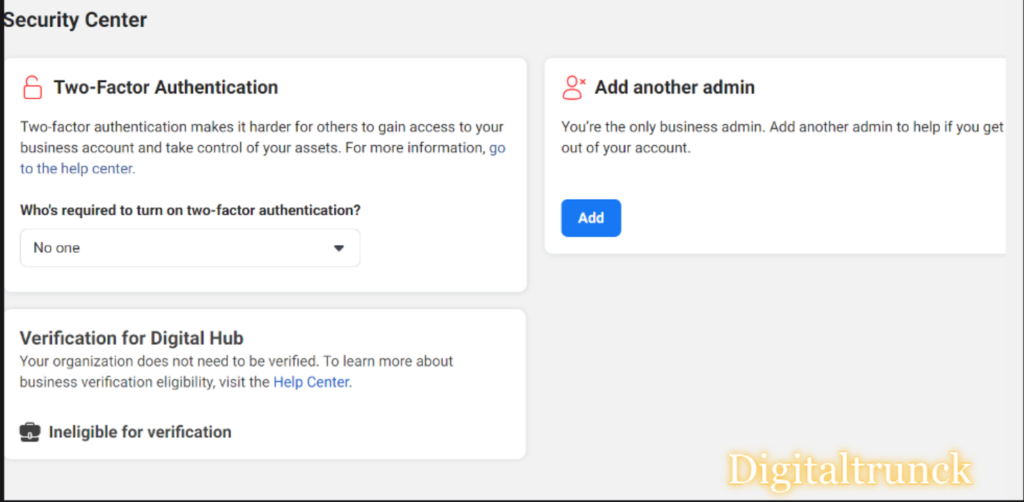
Step 7. Security on your account